



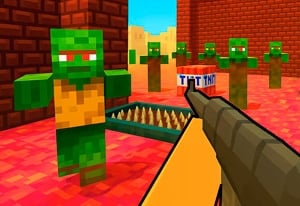
Quick Controls
- WASD → Move. Follow the terrain toward a supported position.
- Mouse movement and left-click → Aim and shoot. Contribute a useful firing angle.
- R → Reload. Prepare before leaving the trench or other protection.
High Score Tips
- Read the ground beyond a trench exit before crossing.
- Choose a different useful angle instead of crowding the squad's only opening.
- Use the displayed bandage action rather than guessing another game's heal key.
Use trenches and squad support to reach the next battlefield position, recovering before an unsupported advance.
- Classification
- Shooter
About Warfare 1942
Warfare 1942 is a World War II-themed team shooter with trenches, period-styled equipment, and shared battle rooms. You can join a match or arrange a room for friends, then contribute to the squad's advance through the battlefield. Recovery with bandages is part of preparing for another exchange.
The important transition is between a protected route and the exposed ground beyond it. A trench can hide part of the approach without making its exit safe. Inspect the next stopping point and the team's supporting lines before crossing. Use the terrain and squad positions to plan the crossing; a familiar battlefield theme does not tell you which routes are currently covered.

How to Play Warfare 1942
Support the selected team battle through readable terrain routes and firing positions the squad can use.
- Join a battle or choose a room setup and read the current task.
- Move through available terrain, inspecting the next exposed exit before crossing.
- Aim and fire from a position that helps the team's immediate engagement.
- Reload with R and follow the displayed bandage instruction when recovery is needed before another advance.
Controls & Timing
Trench cover ends at the transition
Protection along one route does not show the next exposed direction. Choose the place you intend to reach before leaving it.
Support requires a line, not only proximity
A teammate behind intervening terrain may be unable to help the exchange. Consider the available shared view when advancing.
Controls
| Input | Action | When to use |
|---|---|---|
| WASD | Move | Follow terrain toward a supported position. |
| Mouse movement | Aim | Inspect the next opening. |
| Left mouse button | Shoot | Contribute to the current engagement. |
| R | Reload | Prepare before another push. |
| Displayed bandage action | Recover | Follow the current healing prompt. |
High Score Tips
- Inspect the exit before the open ground. Choose the next stopping point while protection remains available. A rushed crossing makes the destination harder to reconsider.
- Use a complementary view. If the squad already watches one narrow angle, inspect whether another approach needs attention rather than occupying the same line.
- Recheck support after a turn. A short physical route can still place terrain between you and the team. Make sure the new position contributes a usable view.
- Recover with the actual prompt. Bandages are described, but the heal key is not specified. Learn that action before relying on a remembered input during an exposed advance.
Key Features
- Trench terrain: Protected routes lead into exposed decisions.
- Squad battles: Shared views and routes influence contribution.
- Joinable rooms: A group can arrange a session through room options.
- Bandage recovery: Preparation includes the character's condition.
Frequently Asked Questions
Can I arrange a game with friends?
You can join battles or create rooms for friends. Read the selected room's rules before assuming another session uses the same conditions.
Which key uses a bandage?
The recovery key is not confirmed here. Follow the current recovery prompt rather than copying H from World War 2 Shooter or another title.
Are tanks necessarily drivable?
No vehicle-control system is established by this description. Judge the actual interaction offered in the match rather than inferring a function from scenery.
Why stop at a trench exit?
It is where the protected approach changes into another exposure. Inspect the next position and supporting firing lines before committing to the crossing.